OUR STORY
White Glove Fans is owned by Tim Marks. With a masters in mechanical engineering and over ten years experience in the product development and manufacturing field, antique restorations are an enjoyable and relaxing pastime to get away from the daily-grind.
At White Glove Fans our commitment is preserving and restoring antique fans, sharing our knowledge with others and having a fun time doing it! We are not a full time business, we do this because we love it. We are passionate about developing improved methods and sharing these techniques with fellow enthusiasts. We are capable of motor winding, painting, polishing, plating, machining and other processes and perform these services on the fans that we restore for our own collection. We enjoying documenting these processes and do so within our Blog. Whether the job requires machining new parts or rapid prototyping an impossible to machine component, we are confident and capable.
White Glove Fans was started to share information about the restoration hobby, provide documentation of the history of these fans, and to create an opportunity to sell some our restorations to potential new owners.
If you have an antique fan, enjoy antique fan restoration, or have interest in antique fans then we ask you to review our restored-fan catalog at the Store as well as check our Blog. We are always happy to answer questions about fans that you found in Grandpa's closet, offer valuations, or buy fans outright. We are especially passionate about GE fans from the cast iron and brass era.
Interested in purchasing a restored fan from us? Contact us to find out how.
Who Are We
Tim Marks
As the owner of White Glove Fans, I enjoy restoring fans when I'm not at work. My background is in mechanical engineering and product development and I've spent the last 15 years working full time on a manufacturing venture. My favorite fans are GE fans and I have a passion for glass-smooth paint and gold pin-stripes. There is nothing I enjoy more than picking up a fan that's mostly gone and restoring it to well beyond its former glory.
Josh Backens
I have been a certified aircraft mechanic for over twelve years. During this time, I have gained extensive knowledge in several separate fields including electrical, hydraulic, pneumatic, fluid, paint, and power plant systems. As a former aircraft maintenance supervisor, I became an expert at quality control and inspection by overseeing overall employee production. I have been interested in antiques ever since I was a child and began restoring them around the age of 10. Over the years, I discovered restoring and collecting fans to be my true calling in the antique world. I am now dedicated to restoring fans to perfection full time. My favorite fan is the Thomas Edison glass backed iron clad.

THE WHITE GLOVE FAN RESTORATION PROCESS
Restoring a fan takes a considerable amount of work. Below is a brief overview of the White Glove Fan restoration process:
STEP 1: DISASSEMBLY
The first step of any restoration is disassembly, degreasing, stripping, blasting and scrubbing! Each and every part comes off of the fan and is separated into categories including brass, steel, cast iron, motor parts, etc. The parts are then put through a process which matches their individual materials and purposes. For example, a motor stator will be soaked for two hours in an ultrasonic bath containing mineral spirits whereas a painted cast iron part is soaked in harsher solvents overnight.


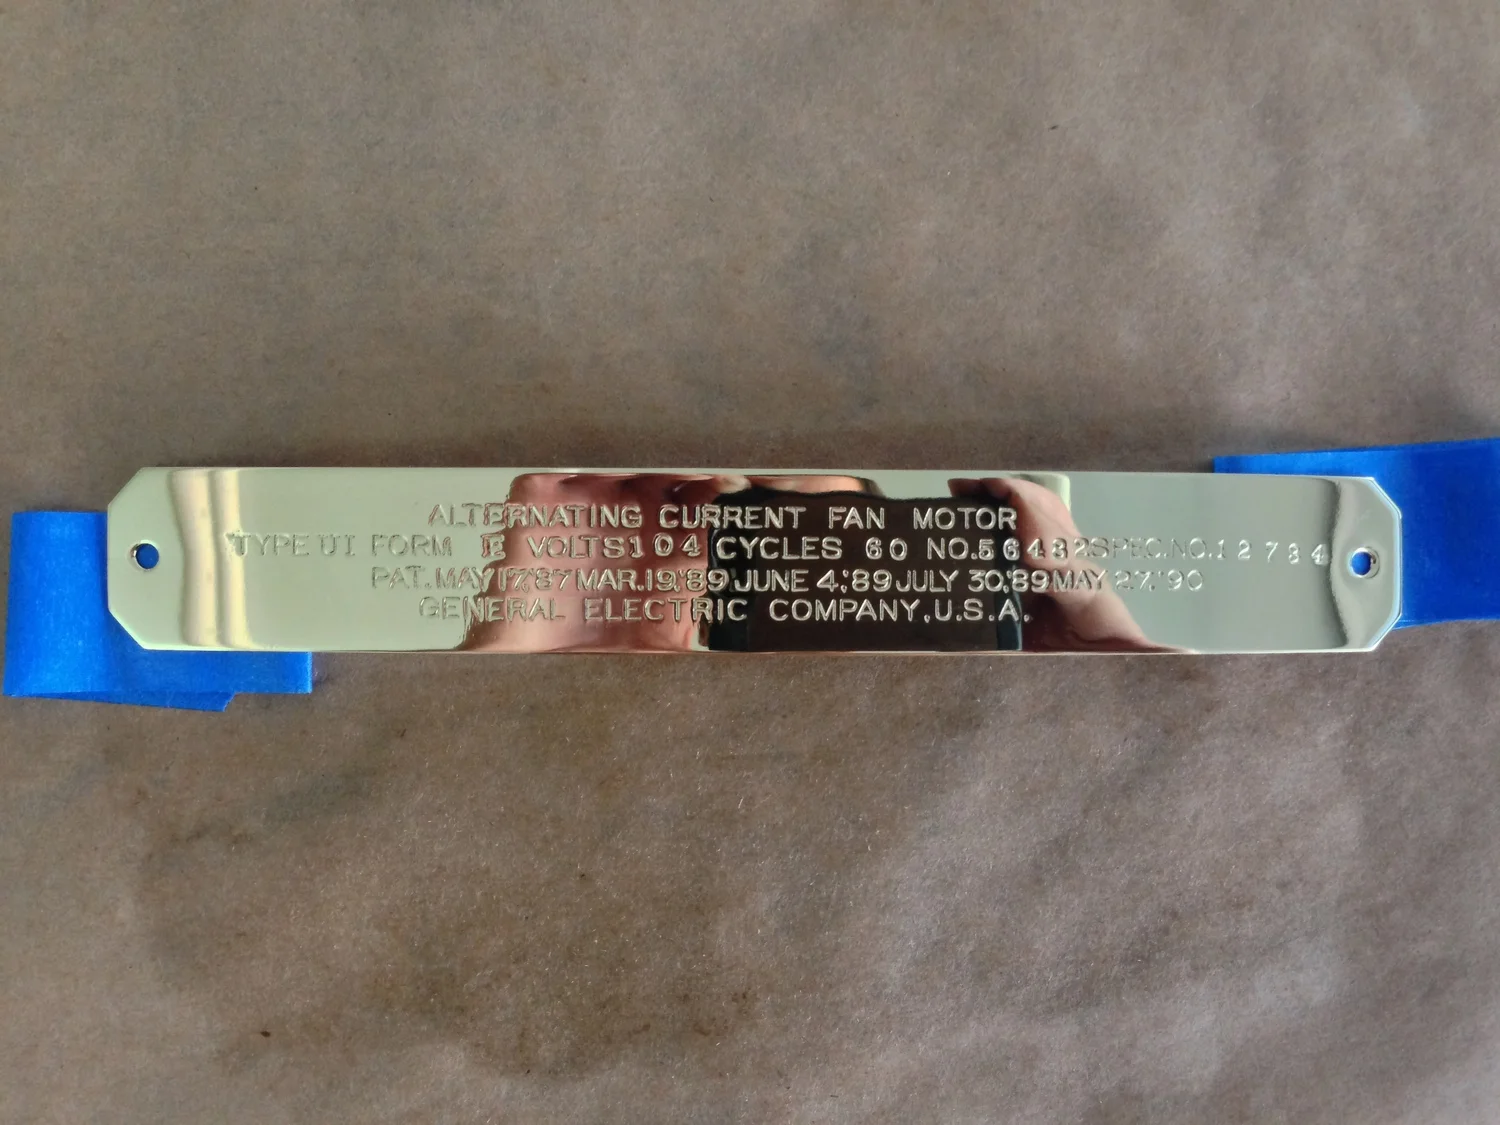
STEP 2: BRASS
After the brass has been stripped it will typically be tumbled. The next step is polishing. Imperfections are first sanded out of the brass and the rest of the parts go to the buffing wheel to receive a multiple step process consisting of cutting and coloring to produce the mirror finish luster that typifies our high-end restorations. The final step is to lacquer the brass therefore locking in the beautiful finish for years to come. Blades are then re-assembled and balanced to produce a vibration free operating condition.
STEP 3: PAINTING
Parts that are to receive a painted surface are sandblasted, sanded, and ground. The paint process consists of a multiple stage automotive grinder with urethane base coat and clear coat. After clear coat our finishes are wet sanded to an absolutely flat surface and then buffed using three stages of compounds to produce a glass-like surface. The final result is a finish as if the cast iron has been coated in glass and must be seen to be believed. Our paint work is our proudest achievement.

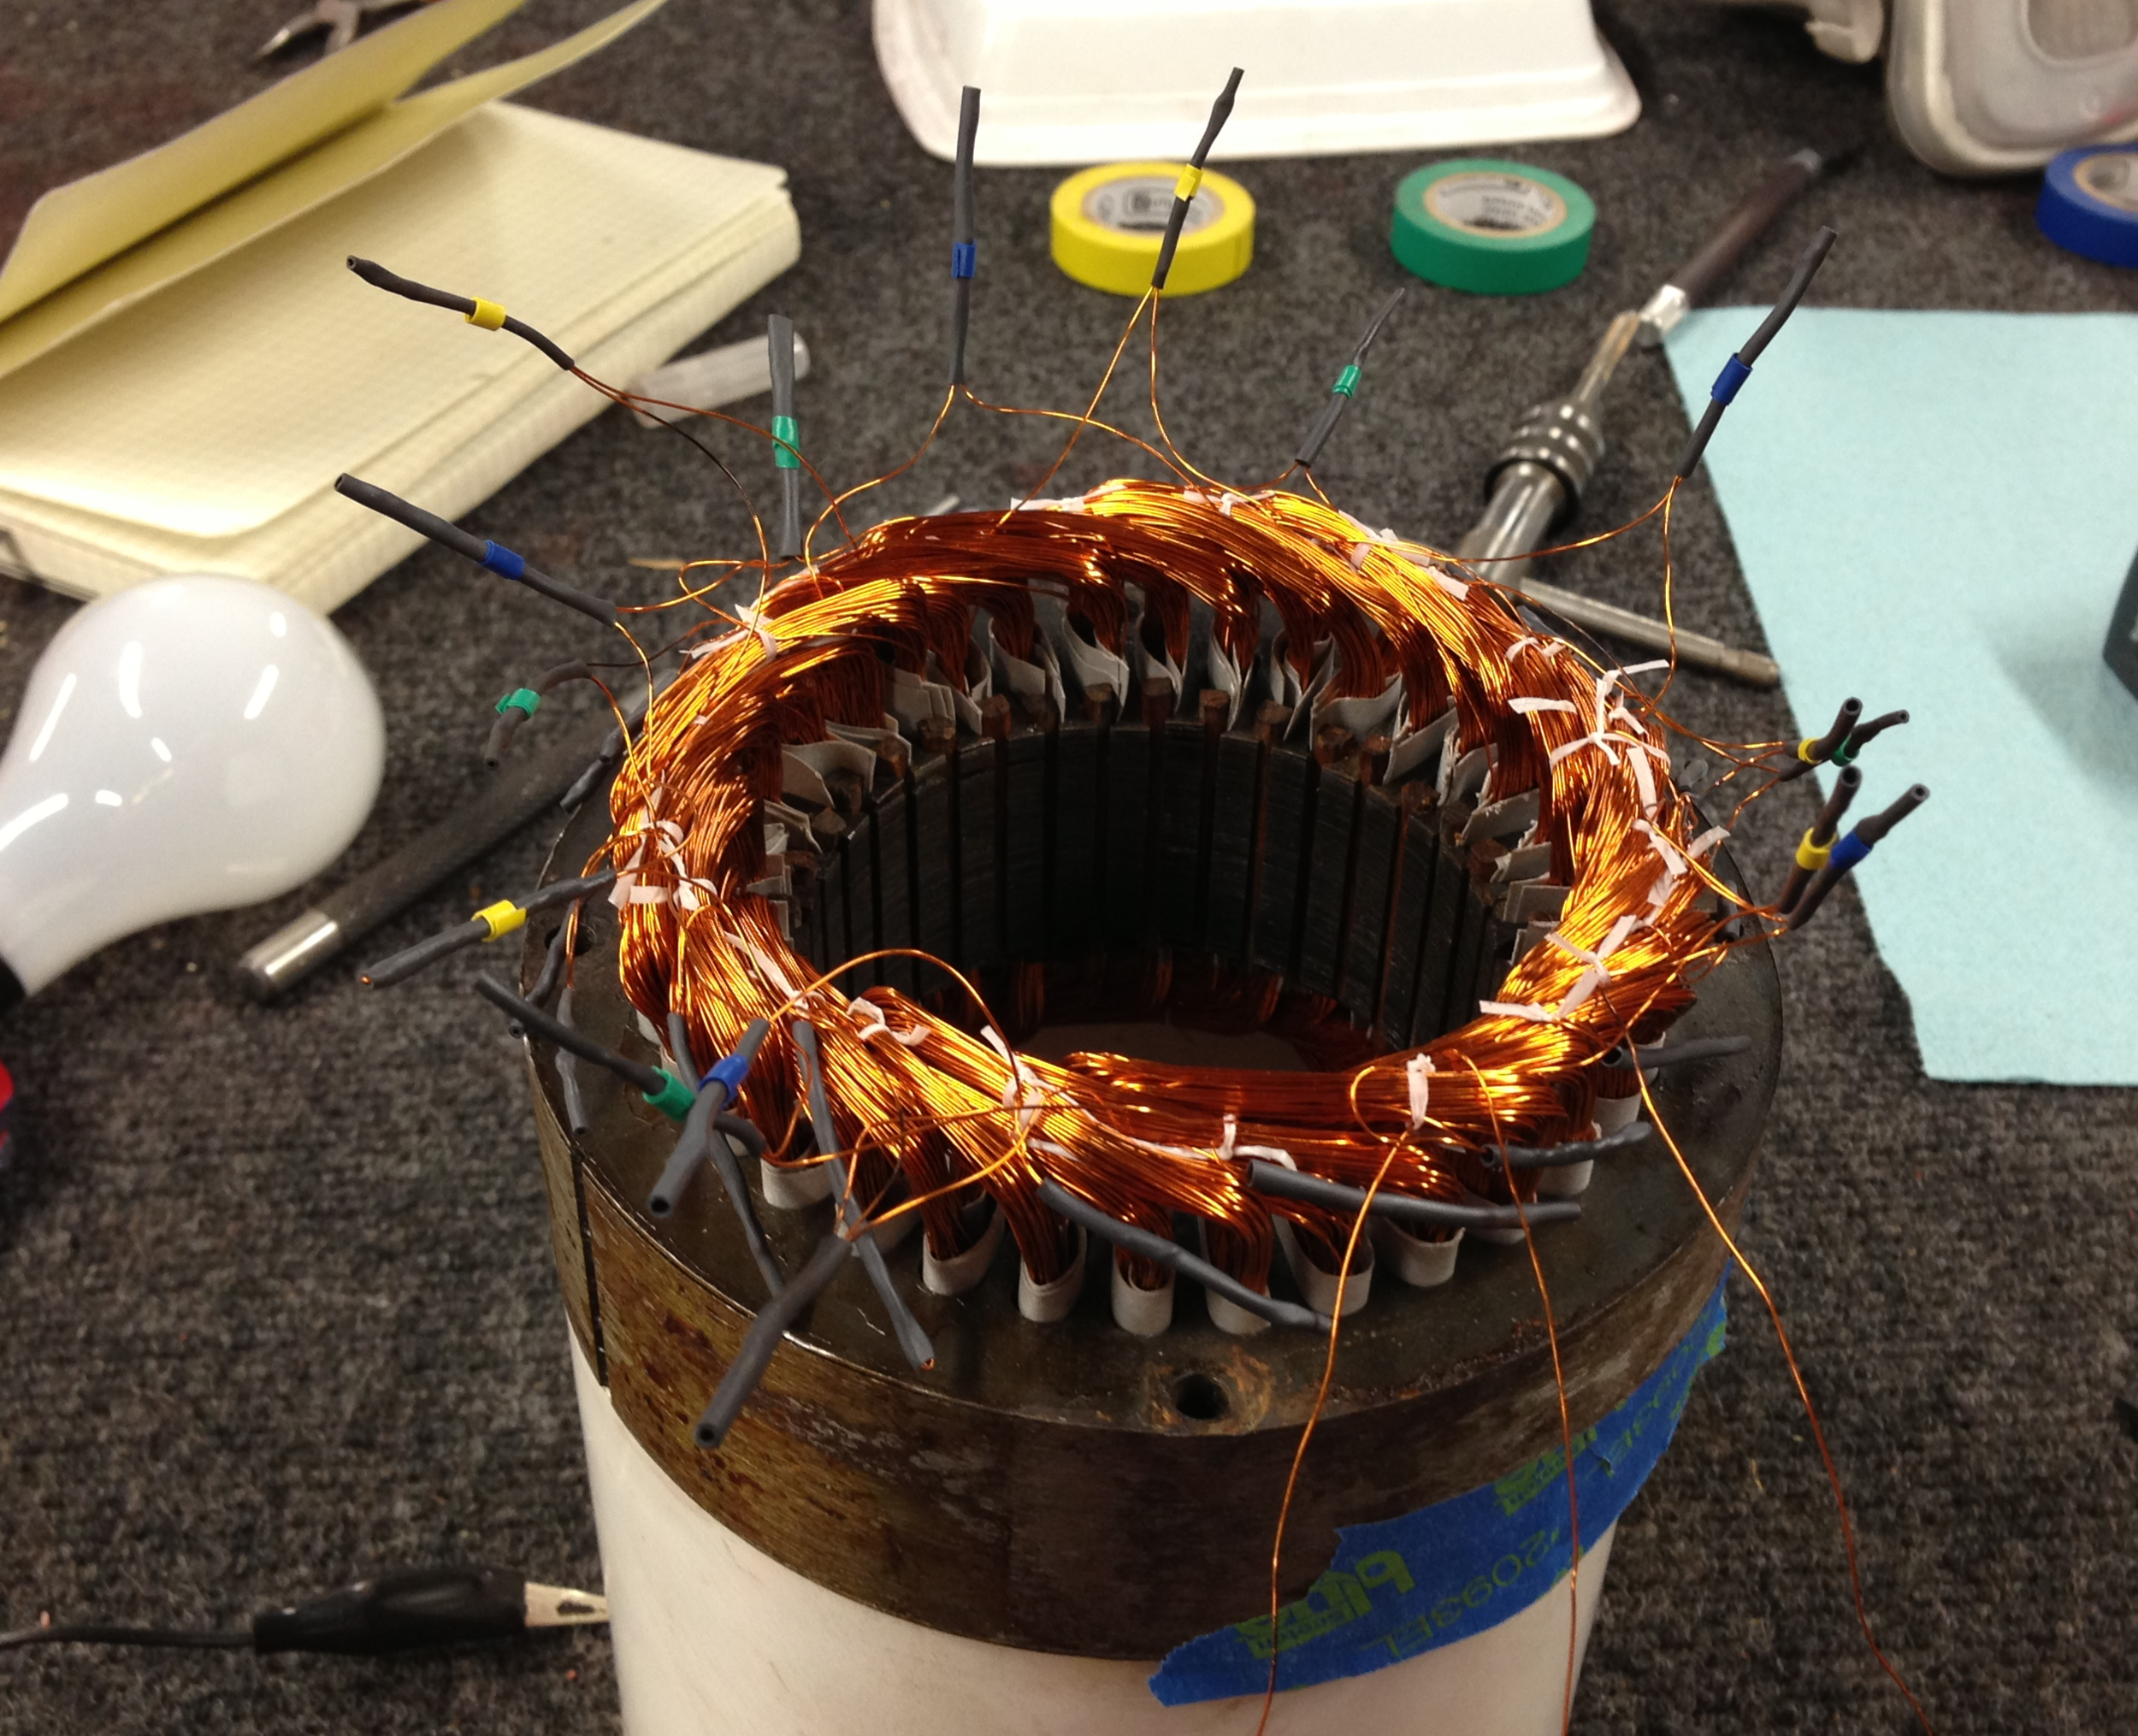
STEP 4: ELECTRICAL WORK
Any electrical work which must be done is now performed including motor re-winds, choke re-winds and replacement cables. Modern high-grade wiring is used throughout and motors can be wound to produce slightly slower speeds at the fan's maximum setting to achieve a quieter running fan. When original motor windings are used the windings receive a thorough coating in varnish to ensure their long term safety and survival. A modern polarized plug in the fashion of an antique is then installed to ensure that the fan could never short out and harm its new owner.
STEP 5: REASSEMBLY
Finally the re-assembly begins. This is when the white gloves come out. All parts have been restored to such perfection that the assembly is a joy. Being careful not to contribute a single scratch, the fan is resurrected one sub-assembly at a time until its original glory is achieved beyond the expectations of even this restorer himself.

STEP 6: APPRECIATION
The final step is simple, enjoy.