

GE Kidney fans are beautiful, quiet, and easy to use. However they're one of the least robust fans that GE ever made. Nearly any kidney fan in unrestored condition will have a broken gear box. Even if your kidney fan doesn't have a broken gearbox, I still recommend this repair because its only a matter of time!
The key to repairing a kidney gear box is to make sure that all the broken pieces exist. If the pieces are missing, unfortunately you may be out of luck as these gearboxes have not been reproduced by anyone for over a year now. To complete this repair you will need to fabricate a steel reinforcing flange such as that shown below. If you would like to purchase one of these parts from White Glove Fans, please contact us.

First thing I did was glue the broken upper flange to a custom steel reinforcement flange using aerospace grade two-part epoxy. Clamping these parts is extremely important for a strong cure.
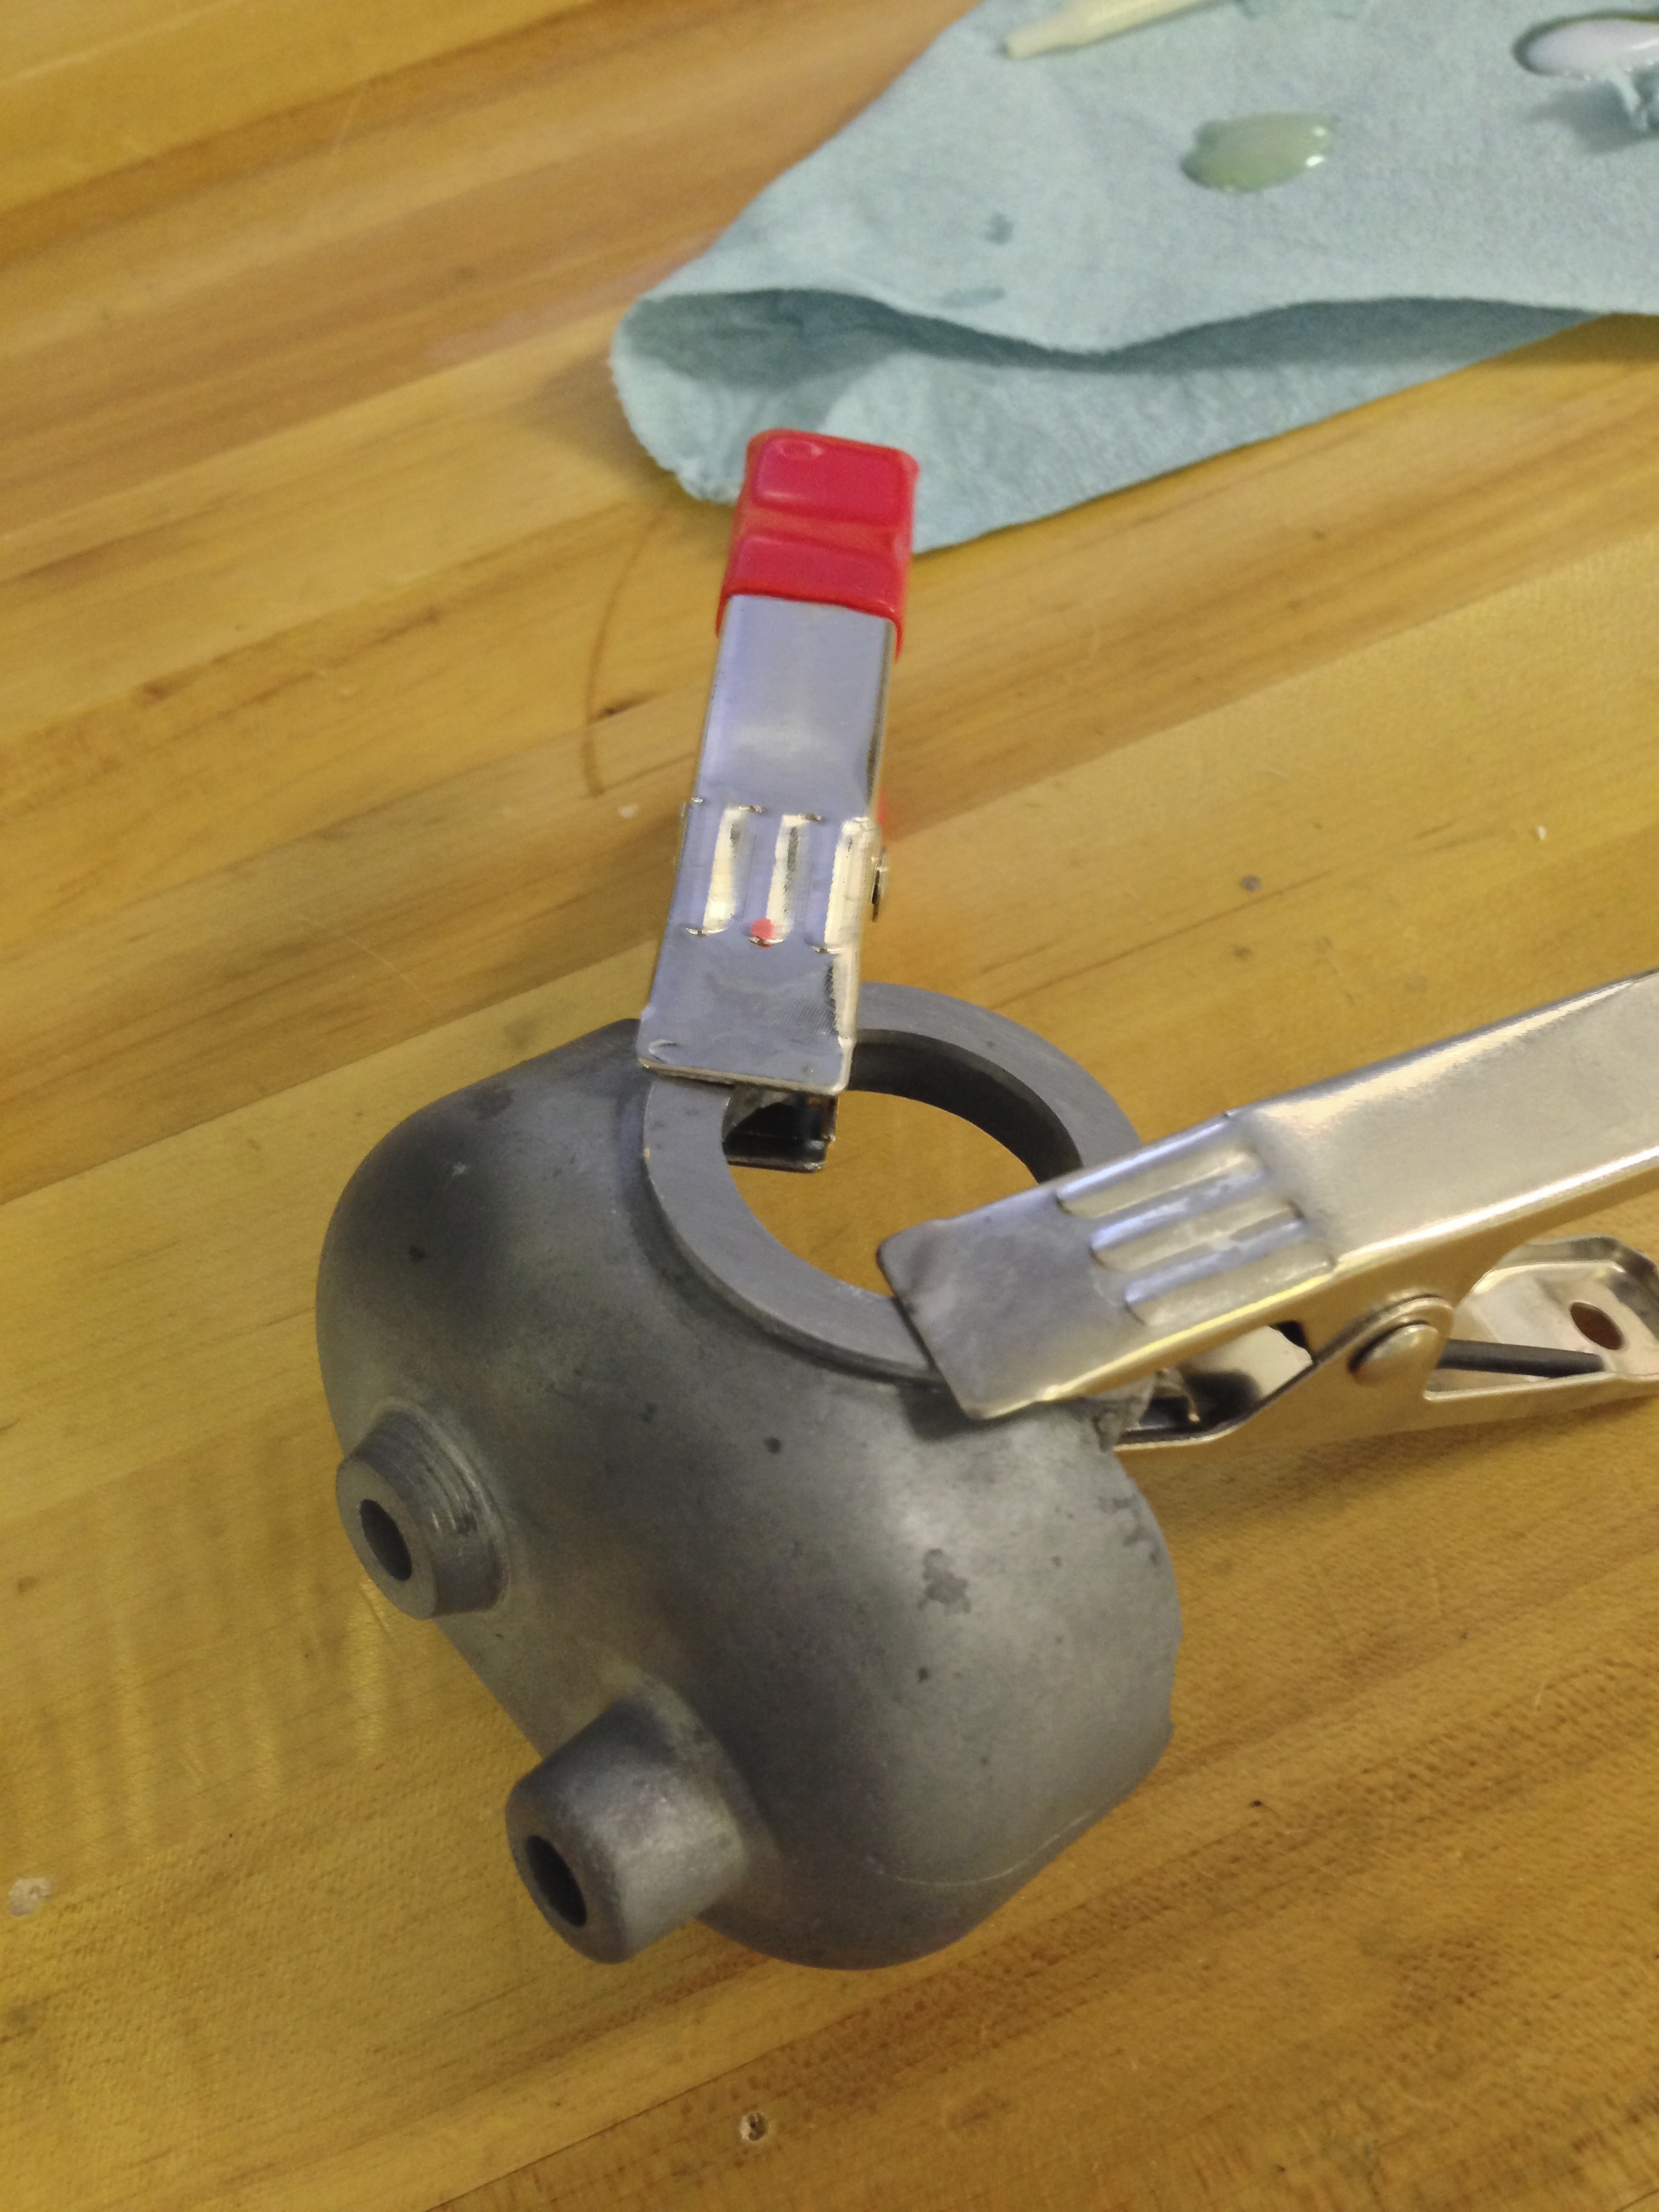
Next this flange is glued to the lower part of the gearbox assembly.

After having been glued.

Next we glue two small washers to the back of the flange to ensure that the original mounting screws sandwich the weak pot metal flange between two strong steel surfaces.

Here you can see the gearbox after having the reinforcing parts added to it. In addition, you can also see that I have drilled out any cracks that exist within the gearbox. The drill holes should be located at the end of the crack, or along any stress points along the way.

The gearbox next must be smoothed over using polyester filler. After filler the gearbox gets sanded, primed, and painted just like any other part.