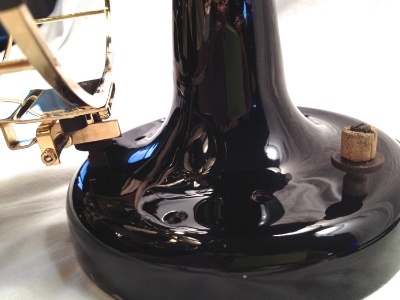
Step 1: Disassembly
Once you acquire a new fan that has nearly all or at least 90% of it’s original paint, some agree that polishing up that 100 year old paint is the way to go. It can be time consuming, but when done correctly the end result is absolutely stunning. The first step is to take plenty of before pictures then completely disassemble the fan. All painted parts will then be cleaned with automotive grade car wash solution.
Step 2: Cleaning and Clay Barring
Once every part of the fan is disassembled, it’s time to start scrubbing! Wash each part with automotive grade car wash solution (I like to use Meguiar’s) and water using a soft sponge. If the part is really greasy, you can add some dawn liquid dishwashing soap to the mix to help remove tough grease stains. Once every part is scrubbed clean, thoroughly rinse, and dry. Now is time to us a clay bar which is a crucial step when polishing original paint. Take a very small chunk of the clay about the size of a silver dollar. Take some clean car wash solution (don’t reuse the original solution, it is now contaminated) and saturate and knead the clay bar. Next, vigorously scrub the part with the clay bar using a circular motion. This will aid in removing nearly all of the dirt and grime that has built up over the last century. If you skip this step and go straight to sanding, you will simply rub more dirt deep into the paint leaving you with less than desirable results.
Step 3: Wet Sand
Wet sanding is done best with a small amount of dish washing detergent like dawn and water. The dish soap lubricates the sandpaper so it will not gum up. It will also cut faster and cleaner, eliminating harmful dust particles. Start with 1000 grit silicon carbide paper (electro coated is optional, just better paper). Let the paper sit in the soap/water solution for at least 30 minutes so it becomes completely saturated. Use a soft foam block to back the sandpaper. Using fingers on flat surfaces will create bumps in the paint from pressure on your fingertips. The block eliminates that. Sand lightly, and check your work often!! You don’t want to completely “burn through” the paint! Just remove enough material so the part appears fairly flat. Around contours, go very lightly using your fingers as pressure on the part. Once the part is flat with 1000 grit, move to 2000 grit paper. All you’re trying to do here is remove the sanding scratches that the 1000 grit put on the part. Moving to 2500 or even 3000 grit is optional, it will just make the polishing process easier.
Step 4: Polish
Polishing requires some major elbow grease if done by hand and a 100% Terry cloth towel. However, there are 3” electric and pneumatic polishers that can be purchased to make this part of the job easy. I start with Meguiar’s ultra-cut compound 105. Polish using this compound until the part appears to have a mirror shine, removing ALL of the 2000 or 3000 scratch marks. If you don’t remove all of the scratches in this step, the next polishing compound will do nothing. Next, I move to Meguiar’s ultra-finish polish 205. Now the part will look like a mirror!! The third polishing step is used with Menzerna’s superior performance polish SF-4000. At this point, you will not believe what you created!! Always take before pics so you can remember how horrible the part looked in the beginning! Finally, I use Menzerna’s power lock polymer sealant. This will make the part look wet like it just came out of the paint booth!! It will also protect the finish like the wax you put on your car.
Step 5: Reassemble and Enjoy Your New Fan!!
For this step, I hope you took plenty of before pictures! Put on the white gloves and reassemble the fan in reverse order of disassembly. Replace head wire and power cord as needed and Enjoy your original, yet brand new looking 100 year old fan!

